Thursday, December 9, 2010

Negative Beliefs About Art – Thoughtful Thursday

Thoughtful Thursdays Copyright 2010 Valerie Jones

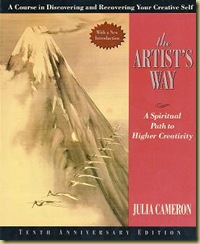
In the book, The Artist's Way, Julia Cameron states, “Much fear of our own creativity is the fear of the unknown.” I have tested this theory and find she is absolutely right! If I am fearful of a technique or medium, I have trouble starting new artwork.

The author lists some commonly held negative beliefs:

“I can’t be a successful, creative artist because:

1.   Everyone will hate me.

2.   I will hurt my friends and family.

3.   I will go crazy.

4.   I will abandon my friends and family.

5.   I can’t spell.

6.   I don’t have good enough ideas.

7.   It will upset my mother and/or father.

8.   I will have to be alone.

9.   I will do bad work and not know it and look like a fool.

10.   I will feel too angry.

11.   I will never have any real money.

12.   I will feel bad because I don’t deserve to be successful.

13.   I will have only one good piece of work in me.

14.   It’s too late. If I haven’t become a fully functioning artist yet, I never will.”

When we have these negative thoughts, they are just negative thoughts. There is rarely any truth to them.

Keep thinking about the negatives and you will become scared. You will start believing these negative thoughts and become too scared to create.

Julia also says, “Most blocked creatives carry unacknowledged either/or reasoning that stands between them and their work. ‘I can either be financially successful or an artist.’” She was writing this for me! I was taught through society that you can’t make a living as an artist.

Next time on Thoughtful Thursday, we will explore ways to turn these negative thoughts around.

Tuesday, December 7, 2010

Jones Jack – Work In Progress

Jones Jack 1

Jones Jack – Work in Progress

Copyright 2010 Valerie Jones

My current work in progress is an antique pump jack.  Since we have the family name of Jones, my brother-in-law requested I draw this for him.  My husband and my brother-in-law do part- time work in the oil field, so this is fitting for them.

I am drawing this on Arches 140 lb watercolor board.  The pump jack is done with Prismacolor colored pencils and the background will be done with watercolor pencils.

Ann Kullberg’s Portrait Tool Kit became a valuable tool for this rusty old jack.  I used the portrait tool kit to get the values of the metal correct.  Some of the shadows in our skin are the same as rusty old metal!  Truly amazing!

Tuesday, November 30, 2010

Cross Stitched Christmas Stocking

Brittany Stocking

Copyright 2010 Valerie Jones


As promised, here is the finished cross stitched Christmas stocking I made for my daughter.

The next unfinished cross stitch project that I need to complete is an afghan.   It has cute kitty pictures on it.

Happy stitching!

Thursday, November 18, 2010

Shadow Artists

 Thoughtful Thursdays

Copyright 2010 Valerie Jones

During my absence this past month, I have been refueling my inner well.  After finishing a piece of artwork that drained me of energy, I took a break.  During this break, I have kept my creative juices flowing by cross-stitching.   I’ll show you the cross-stitch piece after it is complete.

Now to this week’s Thoughtful Thursday -

To live a creative life, we must lose our fear of being wrong. ~ Joseph Chilton Pearce

Are you one of those people who likes art and artists but are too fearful to start being creative?

I used to be one of those people.  Then one day I decided to stop admiring the work of others and try it for myself.  I am so thankful that I didn’t let fear get in the way of those first attempts.

In those first attempts, I wanted everyone to like my paintings.  One person in particular did not like my paintings.  All it takes is one person to put the fear of disapproval.  Even though that person didn’t like my paintings, I had enough support from others that kept me creating.  Don’t put your paintings under the bed  and stop creating if someone disapproves.   We aren’t here to please everyone.  We are all uniquely different.  What one person don’t like a lot of others will like.

Some shadow artists live their creative life through others.  They might marry an artist or become friends with an artist.

Another reason someone might not create is that all their lives they have been led to believe that art is a hobby.   We hear words like, “Making art won’t pay the bills.”  So, we find jobs that pay the bills but end up hating the work.

All it takes to create is a baby step toward that first piece of artwork.  Take an online drawing course, get a book on how to draw, or take a drawing class in your local area.  You will be the same age in 5 years if you take that first step or not.  Why not take that first step?  I took that first step 24 years ago. 

Monday, October 18, 2010

Watermelon – The Drawing Board

Layers Cream_Canary Yellow

Layers of Cream and Canary Yellow

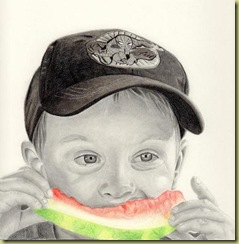
The piece has been sprayed with workable fixative so the graphite won’t smear into the colored pencil. I am now ready to apply color using Prismacolor colored pencils.

I applied a wash of Cream to the watermelon. I kept the white of the paper for highlight areas.

I applied a layer of Deco Pink (discontinued) to the flesh. Blush Pink can be used as a substitute for Deco Pink. Then, a layer of Pale Vermillion was added. I included Carmine Red for the darker red areas of the watermelon flesh.

I added Canary Yellow to the rind. These layers are extremely light for two reasons.

First, the workable fixative is slick so not many layers will adhere. Second, I don’t want the watermelon to overpower the drawing.

Layers Yellow Chartuese_Apple Green Layers of Yellow Chartreuse and Apple Green

Yellow Chartuese was added as a layer to the rind. Then, a layer of Apple Green was applied. I used Dark Green for the “veins”. Limepeel was added as a layer. I applied Apple Green for the darker green areas of the rind.

Layers Dark Green_Scarlet LakeLayers of Dark Green and Scarlet Lake


Back on the flesh, I added Poppy Red to the whole area. Then, Scarlet Lake was used in the darkest reds. The watermelon was looking too pale and very unripe, so I added Pink and Scarlet Lake to brighten it up.


Turner Complete2

Turner

Copyright 2010 Valerie Jones

I blended the whole watermelon piece with the Colorless Blender. It was then sprayed with another layer of workable fixative.

This drawing is ready for delivery to the little man who’s eating a yummy piece of watermelon!

Thursday, October 14, 2010

The Inner Well

Thoughtful Thursdays Copyright 2010 Valerie Jones

Have you ever had a piece of work going so well and all of a sudden there is no creativity flowing from inside of you? Yep, been there, done that? I’m currently in the middle of that crisis.

I have an obligation to fulfill and I have become fearful of the creative outcome. I want to tune it out. I am working out of my colored pencil comfort zone. I’m working in acrylic and want instant gratification.

I need to fill the well. Julia Cameron says in her book, The Artist's Way, “the artist brain is the sensory brain: sight and sound, smell and taste, touch.”

“In filling the well…think delight. Think fun. Do not think duty. Do not do what you should do…Do what intrigues you, explore what interests you; think mystery, not mastery.”

Aah..yes…Think mystery, not mastery. I’m thinking mastery instead of the mystery behind the paint.

So, how can I refill the inner well? Cooking sometimes does the trick for me. Any repetitive action helps. Sometimes I’ll just sit and draw. The repetitive motion of the pencil moving back and forth is therapeutic. Listening to music is a great way to get the creative juices flowing.

Julia Cameron also states, “Our focused attention is critical to filling the well. We need to encounter our life experiences, not ignore them.” So, instead of reading while you commute to work, pay attention to what’s around you. The images you see can help refill the dried up well inside of us.

So, how am I going to refill my dried-up well? I am going to listen to some worship music. Worship music is a great tool for me because our creativity comes from God. Why not give something back to Him in the form of worship?

If you get the chance to refill your inner well, I’d love to hear how it happened.

Next time on Thoughtful Thursday, I’ll write about people who we call Shadow Artists.

Thursday, October 7, 2010

Artist Dates

Thoughtful Thursdays

Copyright 2010 Valerie Jones

I am a firm believer in artist dates.  What is an artist date, you say?  Julia Cameron describes it best in The Artist's Way, "An artist date is a block of time, perhaps two hours weekly, especially set aside and committed to nurturing your creative consciousness, your inner artist.  In its most primary form, the artist date is an excursion, a play date that you preplan and defend against all interlopers.  You do not take anyone on this artist date but you and your inner artist, a.k.a. your creative child.  That means no friends, spouses, children - no taggers of any stripe."

Oh, I've tried the tag-a-longs...it doesn't work, trust me.  They will distract you more than you think.  Some of my favorite artist dates have been taking a nature walk, going to art galleries, going shopping alone (yes, shopping), a photography class, and going to the bookstore.  You might say, "a photography class has people".  Oh, but I got to sneak away alone and snap photos of nature at the wonderful land of Woolaroc!

A great artist date is this weekend at the Price Tower Family Arts Festival in downtown Bartlesville, Oklahoma.   If you don’t live around these parts, be on the lookout for such events in your neck of the woods.

Artist dates have a way of refilling the well.  They unlock creativity buried deep within us.  I'll write more on refilling that inner well next week on Thoughtful Thursday.

Monday, October 4, 2010

Tweaking the Portrait – The Drawing Board

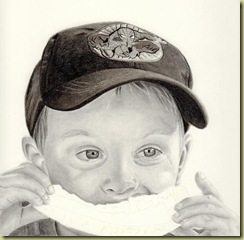
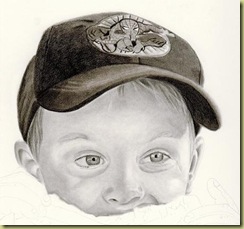
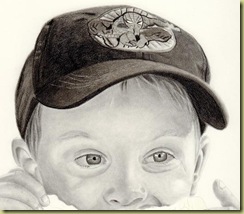
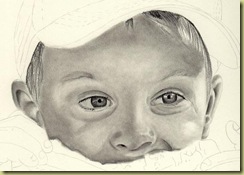
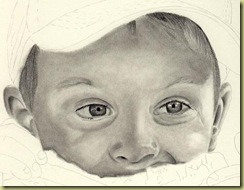
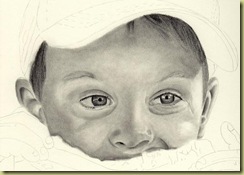
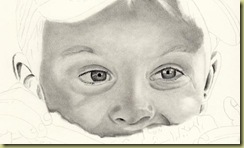
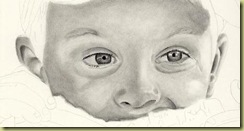
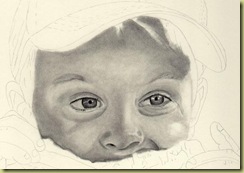
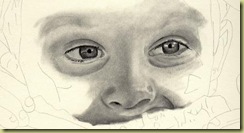
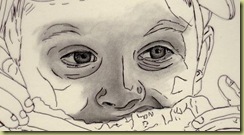
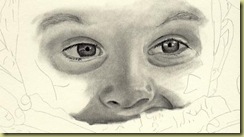
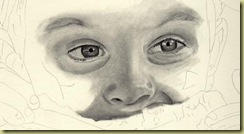
Now that the graphite part of the drawing is near completion, it is time to re-visit each part of the face and darken darks and make any necessary corrections.

First stop, the eyes. The eyes need make considerably darker. Using a 2B pencil, I darkened the outer rim of the eye. I darkened the whites of the eyes with a 2H pencil.

Turner Graphite

I tweaked the left-facing eyebrow by blending again and pulling out some lights with the kneaded eraser.

I moved around the face and added some more darks that had faded during the drawing process.

After all the re-work was complete, I cleaned up the background and the watermelon with a kneaded eraser. Then, I sprayed the piece with Krylon Workable Matte Fixatif. This must be done in order for the watermelon to remain free of graphite. Workable matte fixative enables you to continue to work on the piece after it is sprayed. Other fixatives smooth over the surface and won’t allow continued work.

Next time on The Drawing Board, the watermelon.

Saturday, October 2, 2010

Price Tower Family Arts Festival

FAF2010emailHeader2 I will be at the Price Tower Family Arts Festival on Saturday, October 9th.  If you are out and have a few minutes to spare, stop by and see my artwork.  It sounds like a fun day to be had by all!

The event is located downtown Bartlesville, Oklahoma at 510 Dewey Avenue.

Thursday, September 30, 2010

The Morning Pages

Thoughtful Thursdays

Copyright 2010 Valerie Jones

“A mind too active is no mind at all.” ~ Theodore Roethke

Morning pages are something I have come to respect. They helped me on my journey to unblocking my creativity.

Morning pages are three pages of writing in longhand. No computers allowed. Morning pages are not in journal form but rather stream-lining what your mind is telling you. “Oh, I hate to get up. I want to sleep. The dog wants outside. Blah, blah, blah and so on.” You don’t even have to spell correctly or write neatly. Just write. If you can’t think of anything to write, write that you can’t think of anything to write. The words will come.

Write the first thing in the morning before the day starts.

As Julia Cameron states in The Artist's Way, “All that angry, whiny, petty stuff that you write down in the morning stands between you and your creativity. Worrying about the job, the laundry, the funny knock in the care, the weird look someone gave you – this stuff eddies through our subconscious and muddies our lives. Get it on the page. We write to get to the other side.”

“Even if we look like functioning artists to the world, we feel we never do enough and what we do isn’t right. We are victims of our own internalized perfectionist, a nasty internal and external critic, the Censor (satan), who resides in our left brain and keeps up a constant stream of subversive remarks that are often disguised as the truth. The Censor says wonderful thinks like: ‘You call that writing? What a joke. You can’t even punctuate. If you haven’t done it by now you never will. You can’t even spell. What makes you think you can be creative?’”

“Make this a rule: always remember that your Censor’s negative opinions are not the truth. Make no mistake: the Censor is out to get you.”

“Draw your Censor. If a serpent doesn’t appeal to you, you might want to find a food cartoon image of your Censor, maybe the shark from Jaws, and put an X through it. Post it where you tend to write or paint. Just making the Censor into the nasty, clever little character that it is begins to pry loose some of its power over you and your creativity.”

“Beyond the reach of the Censor’s babble we find our own quiet center, the place where we hear the still, small voice that is at once our creator’s and our own.”

Have you heard that still, small voice? I have…It can be found in the morning pages.

Wednesday, September 29, 2010

The Power of Ice Cream

ice cream scoop 

I have been craving ice cream for several days.  I just couldn't take that craving in the pit of my stomach anymore, so I went to our local frozen custard place.  They had butter pecan custard as their special.  Now, butter pecan is one of my favorites.  I can't resist the buttery smoothness in my mouth.  I bought some, ate it, and somehow the world seemed a better place.  Even the next morning....the world seems a better place....life has hope.

Monday, September 27, 2010

Shirt – The Drawing Board

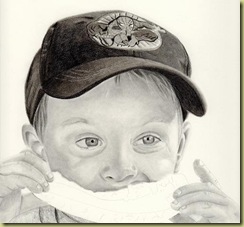
For the shirt, I used a 6B in the darkest shadows. Since I want the detail of the watermelon to show through, I made the shirt a dark, solid color. I used a 4B and a 2B pencil for the initial lay-in. I blended and re-applied pencil as needed.


Shirt

Next time on The Drawing Board, tweaking the portrait.

Thursday, September 23, 2010

Creative Excuses


Thoughtful Thursdays Copyright 2010 Valerie Jones

What have you ever told yourself or are telling yourself why you should not create? Me? I’ve told myself that I needed to wait until I had enough money. Hah! I could still tell myself that because I don’t have any more money now than I did before. But I create anyway. Teaching art classes help fund my addiction to creating.

It is never too late to start creating. I personally know an individual that didn’t start painting until she was 80. She had no clue that she could draw or paint. She now has some of the most beautiful paintings.

Now is the time to create. I could easily tell myself that I don’t have time to create. I have a husband, children, a house, and more than one job. How do I find time to create? After my work is all done and the children are in bed is when I make the time to draw. Yes, I said “make the time”. If you are busy like I am, you have to schedule the time or it will never get done. I would love the luxury of drawing and painting on a whim, but that isn’t always possible.

What’s your excuse? I’d like to hear what is going on in your mind about creativity.

Monday, September 20, 2010

Hands – The Drawing Board

Drawing fingers are tricky. You have to make close observations to where the shadows are lying – is the shadow on that finger or on the one below it?

Fingernails – to make them look their best, draw the skin around them instead of drawing the nail itself. A better representation of the nail is created this way.

I used a B pencil in the darkest darks, HB in the mid-shadows, and 2H for the mid-tone values.

Hands Shade Shading

Hands Blend

Blending

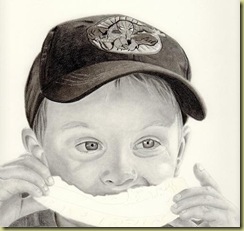
Hand Complete

Hands Complete

Next time on The Drawing Board, the shirt.

Thursday, September 16, 2010

Creative Withdrawal – Thoughtful Thursday

Thoughtful Thursdays

Copyright 2010 Valerie Jones

As I revisit The Artist's Way, I keep coming back to this phrase, “We ourselves are the substance we withdraw to, not from, as we pull our overextended and misplaced creative energy back into our own core.” We ourselves are the substance we withdraw to…huh? What does this mean to me? It’s not that I am withdrawing from myself, who I am. It is more withdrawal from my current life and looking back to the dreams I had for myself. Back to those God-given dreams. Back to that creative energy we once had before we displaced it in the dreams of others.

As I dig up those dreams buried far below the surface, I go through a grieving process. I grieve for letting them go. I get angry at myself for burying those dreams in the hopes of others. I take a time of mourning. The anger, grief, and mourning are preparing me for growth in a new direction.

Join me on this journey as I recover some of those lost hopes and dreams I have for myself. How do you recover your buried dreams?

Monday, September 13, 2010

The Drawing Board – Hat

I’m working with the hat next because I don’t want the hands to smear.

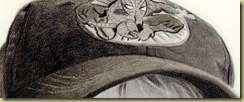
An 8B pencil was used for the shadows of the hat.  Take note – I am not pressing hard, but rather using several light layers.  I don’t want to smash the tooth of the paper by pressing too hard.  If you smash the tooth of the paper, you can’t achieve the depth you need by putting multiple layers of graphite.  Smashing will gloss over and leave a shine.

Hat I worked all over the hat.  I have to admit that I am not a fan of Spiderman.  He isn’t fun to draw either.  Ha!  After I put the darks of the hat in, I went to work on “Spidey”.  I applied the dark lines and and moved to the lighter areas.  Once I had “Spidey” blocked in, I worked on the hat some more.  I’m sorry.  I didn’t get pictures of this process for you.  I did several layers of 8B pencil and blended between each layer.

Spidey 

The threads – I made a lighter space where the threads would be.  These areas have already been blended.

Hat ThreadsI had lost my placing of the threads to part of  the hat.  Remember the clear acetate?  Here it is again.  I needed it to find my placing for the threads.

Hat w AcetateNow, those eraser remnants – here is where they come in handy.  I erased a thin line where the threads need to be.  Then, with the acetate over the drawing, I took a stylus and put indentions in the paper where the threads would be.  Then I blended the area so the threads would pop out.  A stylus should have been used upon the initial outline drawing, but I failed to do that.  Thus, hard work now.  The lines weren’t popping out as they should, so I took a utility knife to scratch out the threads.  I don’t recommend this because it damages the paper.  But, when mistakes happen, (as they will), then you make do with what needs to be done.

Hat Threads 2 Hat Threads

Hat Complete Hat Complete

Next time on The Drawing Board, hands.

Thursday, September 9, 2010

Painting by Faith

Thoughtful Thursdays

Copyright 2010 Valerie Jones

One of my favorite quotes is by Amos Ferguson – I paint not by sight but by faith. Faith gives you sight.

Julia Cameron states in her book, The Artist's Way, that many of us wish we were more creative. Many of us sense we are more creative, but unable to effectively tap that creativity. Our lives feel somehow flat. Often, we have great ideas, wonderful dreams, but are unable to actualize them for ourselves. Sometimes we have specific creative longings we would love to be able to fulfill – learning to play the piano, painting, taking an acting class, or writing.”

Through the tasks in the book, we are able to tap into those dreams and ideas. While working through the tasks, a sense of defiance and giddiness occurs. It happened to me the first time I went through the tasks. While I found the defiance unwelcome, the giddiness was wonderful. Both experiences helped shape me into a different person. I’m glad I took the walk through the tasks to find the real me.

The book also states, “Many of us find that we have squandered our own creative energies by investing disproportionately in the lives, hopes, dreams, and plans of others. Their lives have obscured and detoured our own. As we consolidate a core through our withdrawal process, we become more able to articulate our own boundaries, dreams, and authentic goals. Our personal flexibility increases while our malleability (altered or controlled by outside forces or influences) to the whims of others decreases. We experience a heightened sense of autonomy and possibility.”

I still struggle with investing myself in the hopes, dreams, and plans of others. When I find myself doing this, I take to reading The Artist’s Way once again. It helps me to redirect my energies in a better direction.

Take a leap of faith and go on this journey with me.  I look forward to your company.

Thursday, September 2, 2010

Experiencing Creativity

Thoughtful Thursdays Copyright 2010 Valerie Jones

Genesis 1:27 - So God created man in his own image, in the image of God he created him; male and female he created them.  NIV

Since God created us in his own image, we were made to be creative.  Look at nature around us and see God's creative handiwork!  Maybe we can't make a tree, but we sure can be inspired by what He created.

We are on a journey through the book, The Artist's Way by Julia Cameron.  I agree with Julia 100% when she says, "Creativity is an experience - to my eye, a spiritual experience.  It does not matter which way you think of it: creativity leading to spirituality or spirituality leading to creativity."

She has a list of Basic Principles that I'd like to share with you.  She recommends reading them once a day and listen for changes in your thought system.

The Artist's Way
Basic Principles

by Julia Cameron

  1. Creativity is the natural order of life.  Life is energy: pure creative energy.
  2. There is an underlying, in-dwelling creative force infusing all of life - including ourselves.
  3. When we open ourselves to our creativity, we open ourselves to the creator's creativity within us and our lives.
  4. We are, ourselves, creations.  And we, in turn, are meant to continue creativity by being creative ourselves.
  5. Creativity is God's given to us.  Using our creativity is our gift back to God.
  6. The refusal to be creative is self-will and is counter to our true nature.
  7. When we open ourselves to exploring our creativity, we open ourselves to God: good orderly direction.
  8. As we open our creative channel to the creator, many gentle but powerful changes are to be expected.
  9. It is safe to open ourselves up to greater and greater creativity.
  10. Our creative dreams and yearnings come from a divine source.  As we move toward our dreams, we move toward divinity.

Monday, August 30, 2010

The Drawing Board – Hair

Hair Shading Step 1

Overview to drawing hair - Draw the outline shape of the hair. Begin by applying the dark areas in the direction the hair grows. After dark areas are placed, blend them out to be a halftone value. Reapply the darks by drawing the darks into the light area. Pull the light area into the dark area with the sharpened point of a kneaded eraser. Never try to create the light areas of the hair by leaving the white of the paper showing and drawing around it. The highlights of the hair are actually the light reflecting off the top, outside layers of the hair. The hair creates shadows on the face.

Step 1 – I put in the dark areas of the hair using a 4B pencil. I applied the pencil strokes in the direction the hair is laying. The hair is darkest right underneath the cap because the cap is casting a shadow onto the hair.

Hair Blending Step 2

Step 2 – Once the darks were in, I blended over the whole area of hair. Is the hair done? Absolutely not! For hair to look full and thick, many layers of pencil strokes and blending must occur.

Hair Layers Step 3

Step 3 – I went back in and re-defined the darks and blended again. Pretty dark, huh? Now it is time for the eraser to pull out some lighter values in the hair.

Oh, but wait! Putting in the dark hair is bringing out the darks in the eyes. They’ll still need adjusted, but maybe not as much as I first thought.

Back to the eraser. You want a chisel point on your eraser. It will aid you greatly when pulling out the lighter values of hair.

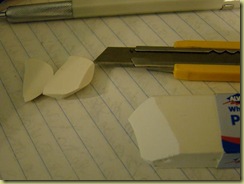
Eraser TutorialI use a utility knife to cut the edges. I keep the remnants because they are just as useful as the eraser.
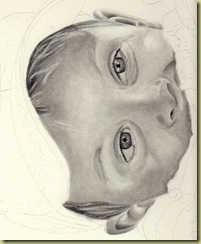
Hair Side View Step 4

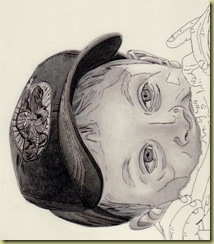
Step 4 – I turned my work on the side so I could see shapes better rather than draw what my mind thought hair should look like. You see how the eraser pulled out the lighter values in the hair? Pretty neat, huh? It’s not looking as dark either.

Hair Complete Step 5

Step 5 – The hair needed more definition, so I went back in the the blending stump.

Ach…I could mess with the hair all day!

Next time on The Drawing Board – the cap.

Thursday, August 26, 2010

Creative Thinking – Thoughtful Thursday

Thoughtful ThursdaysCopyright 2010 Valerie Jones

In Julia Cameron’s book, The Artist's Way, she states -

“The idea that the Creator encourages creativity is a radical thought.  We tend to think, or at least fear, that creative dreams are egotistical, something God wouldn’t approve of for us. After all, our creative artist is an inner youngster and prone to childish thinking. If our mom or dad expressed doubt or disapproval for our creative dreams, we may project that same attitude onto a parental god. This thinking must be undone.”

As a woman, I have been taught that being having a career in creativity is not what women should do with their lives.  Creating art does not pay the bills.  Taking care of a husband and children is what I “should” do with my life.  (We’ll discuss the “shoulds” in life at another time).  I had to create affirmations to rid myself of this fear of God not approving of my artistic endeavors.  I went straight to the Bible for these affirmations.

Proverbs 31:10-31 is a great affirmation from God to women.  The verses that speak to me are 24 and 31.

Verse 24 - “She make linen garments and sells them, and supplies the merchants with sashes.”

Verse 31 - “Give her the reward she has earned, and let her works bring her praise at the city gate.”

What do you fear?  What affirmations can you try?

Monday, August 23, 2010

The Drawing Board – Ears

Ears are different than any other part of the face.  They have a unique shape and the skin is shinier.  Our ears are oilier which creates the shine.  I love drawing ears because of the dark darks and the bright whites.  A lot of contrast is in the ear.

Ear Shading Step 1

This little guy’s ears do not show the interesting shapes and huge contrasts.  I’m up for the challenge anyway.

Since the ear’s shape is so unique, you want to make sure you have an accurate line drawing before you start with the shading.

Step 1 - I started with a B pencil in the darkest areas.

Ears Shading Step 2

Step 2 - After adding the darks, I took the blending stump and blended from dark to light.  I adjusted the lighter areas with the kneaded eraser.  I re-defined the darks with HB an B pencils.

See?  That wasn’t so difficult!

Next time on The Drawing Board is a tutorial on hair.

Friday, August 20, 2010

The Artist’s Way – FANtastic Friday

Artist Way Image 

Over the last 7 or 8 years, I have been an avid reader to The Artist's Way written by Julia Cameron.  Her writing has given me much insight to who I am as an artist and a person.

The Artist’s Way has been an inspiration.  Julia Cameron’s books have awakened the creative in me so much that I have given many of these books away to my art students.   They report back to me that the book often encourages them when they are in an artistic slump. 

I will be highlighting  The Artist's Way in a series of posts beginning next week.  These posts will be labeled as Thoughtful Thursdays.  I hope you will find true inspiration in the weeks to come!

Monday, August 16, 2010

The Drawing Board – Skin Tones

This time on The Drawing Board we are focusing on the skin tones on the face.

Step 1 - Moving up on the forehead, the area under the hat and underneath the hair are darker than the rest of the skin tones on the face.  They are in the shadow. I shaded these in using a B pencil.

Shading Step 1

I’ve filled in some of the other shadow areas on the face with the same pencil.  He’s starting to take shape, eh?

Step 2 – Blend, blend, and blend some more to get the skin smooth.  I use the kneaded eraser to pull out the highlight on the right facing cheek.

Face BlendingStep 2

aah….He’s a cutie…

Next on The Drawing Board are his ears.

Friday, August 13, 2010

Artful Cookies – FANtastic Friday

I am a huge fan of decorated cookies.  I’ve tried to decorate them myself…in another lifetime.  I thought I had some pictures to show you but I can’t find them. 

IMG_4517 

Anyway, I have a new found friend who decorates beautiful cookies!  Her name is Anne Kehn.  Her work can be seen on her blog, The Artist in the Kitchen.  Not only is she a cookie decorator, she loves to create things with paint too.  She’s a wonderful artist with a lot of creative talent.

Anne is a wonderful person, inside and out.  She was kind and made cookies for my daughter’s birthday this year.  In the past year, she has gotten married and moved from the Philippines to the United States.  I hope you’ll take the time to visit her blog and get acquainted!

Monday, August 9, 2010

The Drawing Board – Mouth and Eyebrows

The Mouth -

Again, I start in the darkest area of the mouth.  I used a 2B pencil for this example.  I had to pay close attention to what area of the lip the shadow was resting on.  Don’t always assume you know where that shadow is.  It can trick you sometimes.

Mouth The Eyebrows -

Step 1 – The skin tones underneath the eyebrows must be put in.  You can either put them in now or blend them in later.  I chose to put them in now.  I used a heavily soiled blending stump for the skin tones.  If you have a new blender with little or no graphite build-up, you can fill in the area with a pencil that matches the skin tones in your photo. 

Mouth and Eyebrow Step 1

I lost my outline after putting in the skin tones, so I took the black outline I did on clear acetate to find my place again.

Outline Drawing

Step 2 – Now that I have found my place again, I draw the eyebrow hairs in the direction they are growing.  It is very important to do this.  I used a B pencil that was very sharp to do this.

Eyebrows Step 2

Step 3 – After I draw in the eyebrows, I blend again.  I use a fairly clean blending stump to do this.  I also use a gentle pressure while blending.  I use the kneaded eraser to pull out any highlight areas in the hair.

Eyebrows Kneaded Eraser Steps 3 and 4

Step 4 – We are going to retract a little bit back to the eyes.  Actually, to the eyebrow bone.  Take note that as the brow bone comes up from the eye, it sticks out a little.  The light is going to hit this area.  Make sure to keep it light.  The lower part of the eyebrow will be darker as it curves down toward the eyelid.  Again, most photos flatten this feature.  Draw it in anyway.

Umm…now that I’ve drawn in a lot of the skin tones, I’m noticing the eyes will need to be made darker.  I’ll do that later on in the drawing. 

Skin tones are next on The Drawing Board.

Friday, August 6, 2010

Carolyn Loutzenhiser Watercolor Exhibit


I took myself on an artist's date.  I haven’t had much time to myself this summer, so now was the perfect time.  It had just rained and the temperature outside wasn’t hot and steamy.

Woolaroc has a watercolor exhibit done by Carolyn Loutzenhiser.  The exhibit runs from August 1st through part of September.  Carolyn is a member of the National Watercolor Society.  Her work will take your breath away.  The exhibit is cool and refreshing on a hot summer day.  The vibrant whites literally pull you into the painting.  It’s like drinking a cold glass of water.  You will see Koi, flowers, birds, old buildings, and wildlife in her paintings.

Take a camera with you.  While on your drive through Woolaroc, you might be amongst the buffalo roaming in the pastures and on the road.  You don’t want to miss this great photo opportunity.

Woolaroc is open Wednesday – Sunday, 10:00 am – 5:00 pm.  Tickets are $8 for adults, $6 for those over 65.  Children 11 and under are free.

Wednesday, August 4, 2010

Hot Butter Sauce

028a

Maybe it’s because the weather is so hot that people’s brains are fried.

Maybe it’s because I washed my windows and a precious hummingbird was killed.

Maybe it’s because I had trouble in 3 of the 5 stores I went into.   All I wanted to do was get home and eat my snack of pretzels dipped in cream cheese.   That’s all I wanted, really.  Two of the stores rang up my purchase for more than the original cost.  So, I had to wait e-x-t-r-a time for a refund.  All the while, my foot is tapping, waiting for that snack of cream cheese and pretzels.  The store I went into to buy the pretzels had an upset employee.  Then, they didn’t have the creamy pretzels I wanted.  I had to settle for the extra salty ones.  Finally, I get home for my snack of cream cheese and pretzels.  I get the snack ready and take time to let the cat in from the heat.  While letting her in, my snack of cream cheese and pretzels lands face first onto the floor!  That was the deal breaker.  I had kept my cool until then.  I re-fix my plate of cream cheese and pretzels while the dog snarfs down some of the pretzels that fell on the floor.  I settle down in my comfy chair to eat my long-awaited snack.  Then the ultimate happens…the dog (who had eaten too fast) barfs on the floor in front of me.  I almost barfed right then and there.  I cleaned up the yucky mess and finished my extra salty snack of cream cheese and pretzels.

Or maybe it’s because I have an addiction to real butter that I’m going to share a recipe with you today.  This is really good on crepes, waffles, pancakes, or whatever you like syrup on.


Hot Butter Sauce

½ cup butter

1 cup sugar

½ cup cream

Mix together in large saucepan.  Cook on medium heat until thickened.  (It takes about 30 minutes to get the thick consistency.  If you want it thinner, cook it for a lesser amount of time.)

Sunday, August 1, 2010

The Drawing Board – Noses

Step 1 - I start the nose in the darkest area – the nostril.  I used an 8B pencil with gentle pressure for this.

Nostril

Step 1

Then with a B pencil, I fill in the rest of the nostril and the darker skin tones.

First Blend Step 2

Step 2 – Blend all areas of the nose.

Kneaded Eraser Step 3

Step 3 – After blending, I start fine tuning using a kneaded eraser.  I use the kneaded eraser to pull out the highlights.

The area right above the nostril has reflected light.  Remember to put areas of reflected light in your drawing even if the photo doesn’t show it.  I have found that cameras flatten a subject.  A good rule to remember…know your subject matter well if you want to create realistic drawings.

I usually do the mouth next.  This picture shows very little of the mouth.  I’ll finish it and move to the eyebrows next time on The Drawing Board.