The Mouth -
Again, I start in the darkest area of the mouth. I used a 2B pencil for this example. I had to pay close attention to what area of the lip the shadow was resting on. Don’t always assume you know where that shadow is. It can trick you sometimes.
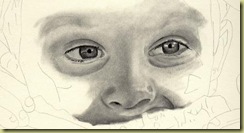
Step 1 – The skin tones underneath the eyebrows must be put in. You can either put them in now or blend them in later. I chose to put them in now. I used a heavily soiled blending stump for the skin tones. If you have a new blender with little or no graphite build-up, you can fill in the area with a pencil that matches the skin tones in your photo.
I lost my outline after putting in the skin tones, so I took the black outline I did on clear acetate to find my place again.
Step 2 – Now that I have found my place again, I draw the eyebrow hairs in the direction they are growing. It is very important to do this. I used a B pencil that was very sharp to do this.
Step 3 – After I draw in the eyebrows, I blend again. I use a fairly clean blending stump to do this. I also use a gentle pressure while blending. I use the kneaded eraser to pull out any highlight areas in the hair.
Step 4 – We are going to retract a little bit back to the eyes. Actually, to the eyebrow bone. Take note that as the brow bone comes up from the eye, it sticks out a little. The light is going to hit this area. Make sure to keep it light. The lower part of the eyebrow will be darker as it curves down toward the eyelid. Again, most photos flatten this feature. Draw it in anyway.
Umm…now that I’ve drawn in a lot of the skin tones, I’m noticing the eyes will need to be made darker. I’ll do that later on in the drawing.
Skin tones are next on The Drawing Board.


No comments:
Post a Comment