Monday, December 5, 2011
Upcoming Classes in NE Oklahoma
Monday, November 7, 2011
Blessings
Copyright 2011, Valerie Jones
This past week I have been awakened to all the blessings in my life. It’s a wonderful, peaceful feeling that has washed over me as I think about all the people who have walked along side me. Life on earth can be a pleasurable journey.
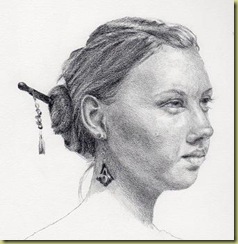
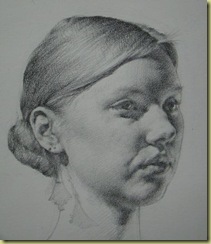
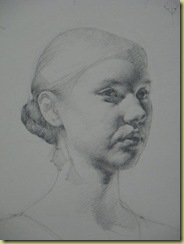
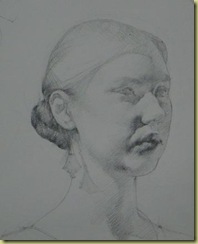
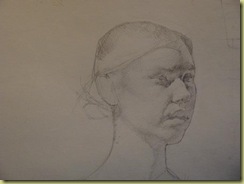
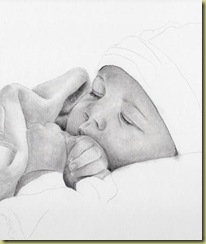
Above is a graphite drawing of “Cara”. She was one of our models while at The Ryder Studio. I am teaching the method of drawing that I learned while there. I have seven amazingly talented students who are learning how to draw “Cara”.
Monday, October 31, 2011
Monday, October 17, 2011
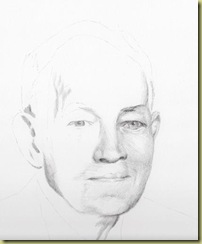
Mr. Parker – Week 2
Mr. Parker – Work in Progress
Copyright 2011, Valerie Jones
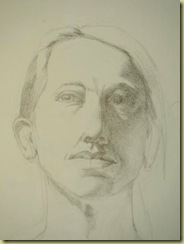
As I begin Week 2 of working on Mr. Parker, I find myself smiling back at him! Do your paintings and drawings talk back to you?
Tuesday, October 11, 2011
A Peaceful Calm
Copyright 2011, Valerie Jones
Ever have a day when you want to draw and all your pencil strokes come out choppy? I had such a day recently.
What did I do to remedy the problem? I took a scratch piece of paper and practiced only pencil strokes. As I practiced, a rhythmic feel came over the pencil strokes. As my pencil strokes calmed, so did my breath. Everything seemed to work better.
What kind of technique do you use when you need to create a peaceful calm to draw?
Monday, September 19, 2011
The Ryder Studio – Day 10
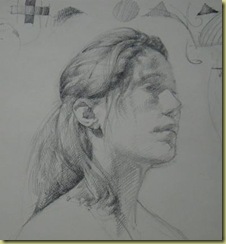 Copyright 2011, Anthony Ryder
Day 10
Santa Fe, New Mexico
The last day of my experience at The Ryder Studio…an awesome time of learning. I was saddened to see it come to an end. I am looking forward to returning again in the near future!
We learned about drawing hair on the 10th day. The hair is sometimes darker than skin tone and sometimes lighter.
Hair is just another form.
The border of the hair on the head is very important to get.
Don’t draw the block-in as a generic form. Draw it as an appearance of what the person looks like.
Look for the hair shape during the block-in.
Continue the scalp with an imaginary line through the hair to help create the form shape.
To some degree, the hair clings to the head, like a cap.
Hair naturally groups into locks.
When things overlap, use a T-intersection. Same goes for the hair.
We all know what it feels like to put your hair behind the ear. Make that feeling happen.
The locks of hair are sort of glued together, in a sense.
After the shape block-in of the hair, then add the placement of the locks, each with a certain convexity.
For short hair or hair challenged people, draw forests of hair with meadows in-between. Crew cuts, etc.
Hair is glossy and shiny – as it arks up and turns, it reflects a highlight. As it turns back down it starts to darken again.
The highlight cuts across the shape of hair in a different way than it does on the face.
Shapes of shading are shaped like tornadoes.
After the block-in and shape placements, then add tonal washes.
The highlights in the hair follow the shape of the light on the forehead.
The terminator of the jaw-line follows into the hair.
When hair falls into the shadow, you have a less-see zone.
Remember not to over-define areas in the shadows, draw only what you see as accurately as you can.
Hair casts shadows on the face.
As hair is not solid, the cast shadows are not solid. They sometimes are fuzzy. ie: dappled sunlight on the sidewalk from a tree at sunset.
Draw hair in a scruffy fashion instead of smooth and silky. If you are having a bad drawing day, draw some hair.
Hair falls vertically at a faster rate than hair falls horizontally.
Hair has a certain spring to it.
When the curl sits on a shape it curves differently.
Leave the highlights the white of the paper.
Think of mixing eggs for scrambling when applying the pencil to the paper.
Value is an aspect of color. You can give a sense of color about how dark the values become.
When class was finished for the day, this is what I came up with. I drew “Souzy” for 4 afternoons. She isn’t complete at this stage, but she has a good start.
Monday, September 12, 2011
The Ryder Studio – Day 9
Copyright 2011, Anthony Ryder
Day 9
Santa Fe, New Mexico
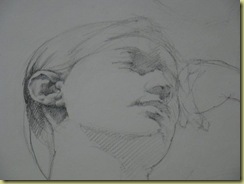
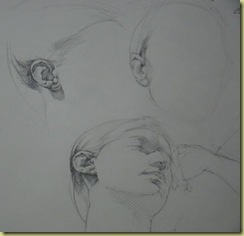
We learned all about ears on the next to the last day at The Ryder Studio.
There is kind of an updraft from the neck out to the ear shape.
The ear is around the horizon, around the side of the face.
Keep in mind that the hair tucks behind the ear.
Where the hair originates from the scalp, it is like it is just born, with little color to it.
Although the ear sticks out, it is rooted to the head.
The rim of the ear is wide to narrow with little kinks in it. It is not smooth! Think of it as having mosquito bites.
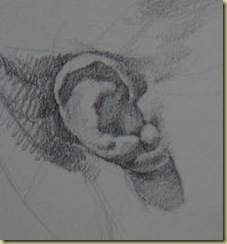 Copyright 2011, Anthony Ryder
The central part of the ear form pushes out.
Pay attention to the tilt of the ear.
While working in the shadows, lightly block in the shadow shapes and gradually work up to the darkest dark.
 Copyright 2011, Anthony Ryder
Remember that drawing tells a story.
And…You get endorphins from foreshortening!
Monday, September 5, 2011
The Ryder Studio – Day 8
 Copyright 2011, Anthony Ryder
Day 8
Santa Fe, New Mexico
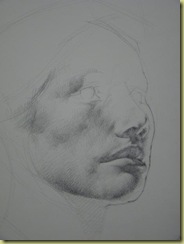
We started Day 8 at The Ryder Studio talking about lips. I learned a lot about how not to fence things in that day.
Anthony Ryder started his demonstration with saying that lips are around the face, from under the nose to the top of the chin, earlobe to earlobe.
When you bring the edge of the mouth up toward the nose, it doesn’t make a corner edge. It tucks up under the lip.
Think of the upper lip like a very round rowboat. If looking up the bottom lip will curve downward instead of upward.
I learned that the terminator lives in the form shadows.
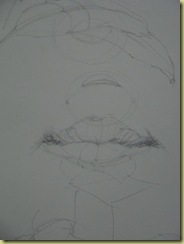
The bottom lip has lobes, like a peanut.
 Copyright 2011, Anthony Ryder
The rim of the lips are not a shape! There is a roundness to it, with little breaks here and there.
Lips are like a string purse.
The lower lip is shaped almost as if you are sticking your tongue out. The diffusion on the bottom lip is not always pronounced on certain people.
Every convex form on the body has a certain degree of roundness.
The forms of the body are non-separate and integrated in the forms around them.
The mouth shape goes into the cheek, helping form the cheekbone area.
With shading, we tend to put the big shapes in and forget to put the smaller interwoven lines of shading on the form.
Monday, August 29, 2011
The Ryder Studio – Day 7
Copyright 2011, Anthony Ryder
Day 7
Santa Fe, New Mexico
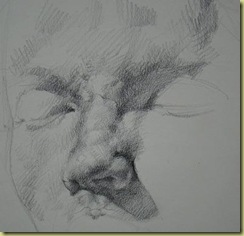
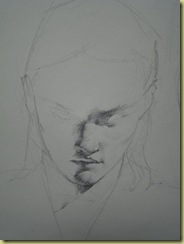
On the seventh day at The Ryder Studio we learned about noses. Just look at the detail in the picture above that can be seen on the nose! Amazing!
Noses, in general, are wider into the forehead.
A nose has shadows that run at right angles to the direction of the light.
Nostrils are not drawn as exhaust pipes…o o
The tip of the nose has a furrow in it.
The nose is a projection of the skull. It turns with the head. The turned portion of the nose is far shorter than the side closest to you. There is no contour to the opening on the far side.
People like lines because it creates ownership. Do not fence the shadows of the nose in. ie; the nostrils
The mouth is a spherical form. Roundness comes up to meet the bottom of the nose. There is a slight curve at the bottom of the nose as it sits on the top of the lip. The philtrum has sub-forms. The philtrum is wider at the top, toward the nose.
Do not draw a fence around the nose highlight.
Pay attention to shadow shapes and form shapes.
Form is a shape. Shadows have shapes that form from the shape of the form.
Think of the nose as an upside down tree. It has roots going up into the eyebrow areas, way up into the forehead.
 Copyright 2011, Anthony Ryder
The eye is built from the same kind of rhythms coming out of the nose.
The nose is kind of knit into the head.
The light side of the nose has light shadows. Do not make them dark!
Do not overmodel…learn how to integrate the forms into the drawing by being subtle.
Think of the head as a bus and the features are like passengers on the bus. Wherever the head goes, the features go too.
Something to keep in mind…Draw the light on the form and not the skin pigment.
Monday, August 22, 2011
The Ryder Studio – Day 6
Copyright 2011, Anthony Ryder
Day 6
Santa Fe, New Mexico
Day 6 began the second week of studying with Anthony Ryder at The Ryder Studio! This week proved to fly by in a hurry. Now that I’m home and trying to draw from a live model, I find that I still have a lot to learn.
On Day 6, we learned how to draw eyes. Anthony Ryder began the day by reminding us that the eye is basically a hollow sphere.
Copyright 2011, Anthony Ryder
The upper eyelashes are thicker than the bottom eyelashes.
From the side view, the triangle shape of the eyelids are foreshortened. The more the person is turned away, the more foreshortened the feature.
Things to think of when drawing -
- The upper lid catches the light.
- The downward facing surface of the upper eyelid is dark, (rounding down).
- The upper side of the bottom eyelid is light.
-The upper eyelid is casting a shadow on the eye surface.
- Highlight is toward the light source on the upper part of the pupil.
-The lower part of the iris will have a smaller highlight.
-The highlight on the pupil (closest to the light source) has a slight anti-halo around it, (sitting on the cornea).
I learned a new term – truncate – to remove part of a geometric shape. Now I can’t remember why I learned it! Guess I need to go back to the studio…
It is very important to get the shape of the eye correctly. It gives the position of the head.
When drawing the highlight of the eye, put a little fence around it. The highlight “floats” in the dark space of the pupil. The highlight is the only part of the portrait that he puts a fence around.
“Iris” is the Greek word for rainbow.
The bottom of the top eyelid line is the “porch”. The eyelid is the “roof”.
The upper eyelid is non-parallel.
Check the angles of the facial plane very carefully.
When setting the eyes on the head, the width of the bridge of the nose- there is a funnel shape from the forehead to the bridge of the nose.
The term “terminator” is the form shadow edge of a shape.
Notice the spinning around shape of the head.
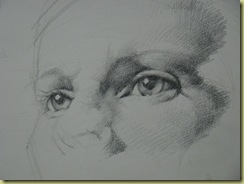
The upper eyelid curves down into itself. It creates a soft edge. The nose edge is almost another form. You will see this in the photo at the top of this post.
The shape of the light is the critical part of the drawing. Kind of like the beef of the hamburger.
The curve is inside of the beautiful shapes.
The pathways of the human form are like flowing curving movements of music.
Celeste Ryder sat with me in the afternoon while I was drawing. She gave me some helpful tips. When drawing the nostril, tuck in the shadow. Ask yourself where is the shadow and where is the light on the form? They eyeball is sitting on the inside of the eyelids. Wrap shapes around and marry it to the form.
Monday, August 15, 2011
The Ryder Studio – Day 5
“We don’t have to be superheroes to have an incredible experience as an artist.” – Anthony Ryder
Copyright 2011, Anthony Ryder
Day 5
Santa Fe, New Mexico
By the 5th day in class, the demonstration that Anthony Ryder was working on began to take shape. The hair became life-like.
Tufts of hair come out of the forehead. To draw hair this way, you need to work on the negative drawing. Toned paper works best when drawing hair.
Draw what you see. Draw the fuzzy edges. Don’t draw what you “know” is there.
A strand of hair has a fullness about it.
Multiple hair strands are a little like the Blue Ridge mountains, going off in the distance.
When you draw the parting of the hair, you can draw it kind of like a valley.
The line and the light need to agree.
The funny overlap and gaps are what you need to look for when drawing hair.
To make the tonal direction of the hair, go across the grain of hair.
When drawing ears, watch for the movement within the ear. The way the ear functions is kind of like a radar dish or trumpet.
When drawing the nose, the highlights of the nose are no fly zones.
Anthony & Celeste Ryder studied under Ted Seth Jacobs while learning the technique of drawing light on form. Ted was born in 1927 and studied during WWII. Ted created restructured realism.
Ted Seth Jacobs has written several books. Drawing with an Open Mind is one that has been popular with artists. He has a new one that I would someday hope to have in my library, The Dictionary of Human Form.
I had finally moved past the block-in stages of drawing into the shading. We had worked on “Cheryl” for two afternoons. Here is what I accomplished during that time.
Monday, August 8, 2011
The Ryder Studio – Day 4
Copyright 2011, Anthony Ryder
“The human body is like a symphony.” – Anthony Ryder
Day Four
Santa Fe, New Mexico
On the fourth day at The Ryder Studio, we learned a lot about the whole drawing process.
Draw the nose using very minute details. Draw moment by moment. Minute details are used to capture the likeness of the model.
Don’t draw exact lines parallel to the other lines. Pay attention.
The teeth are a portion of a sphere. Think of the mouth being a section of an orange.
Don’t put as much focus in your drawings. Think of how Vemeer captured the likeness without too many details.
Create soft edges, not hard edges.
The Florentine and Renaissance masters had complete drawings of a subject before putting them onto canvas.
Anthony Ryder has always been drawn to softness of the Florentine style.
Pay attention to the distribution of light across the form.
Light doesn’t stop – it continues on across the form.
Think of the tear ducts as being part of the nose.
Take time, slow down, and enjoy the process. Drawing is not mindless creativity, as some people think. Every form on the surface of the body is unique. Every pencil stroke is thought out, it is not mindless.
If you just draw value change, you don’t get the shape of the form. Think pixels.
Friday, August 5, 2011
Star Bracelet & Necklace
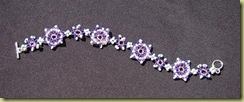
Star Bracelet, 8”, $45 US Dollars
Due to extreme enjoyment at The Ryder Studio, I decided to start a fund to help with tuition costs so I can attend the summer class in 2012. To help with the funding, I am making jewelry.
This set of a bracelet and necklace is made from light pink, purple plum, and jade green colors strung with Wildfire thread. It comes to you with a star design.
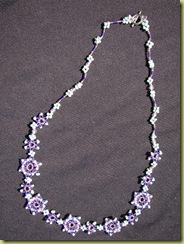 Star Necklace, 22” $60 US Dollars
If you are interested in purchasing one or both of these items for yourself, a friend, or your spouse, you may do so in my store.
Monday, August 1, 2011
The Ryder Studio – Day 3
Copyright 2011, Anthony Ryder
Day Three
Santa Fe, New Mexico
On the third day at The Ryder Studio, we learned about hair and ears.
We learned to pay attention to where the hair sits on the edge of the face. Do not merge it into the side of the face. This will flatten the image.
In a painting, what touches us the most is the feeling of depth.
The better we understand the subject, the better artist we become.
Give the subject more “brain” capacity. Don’t make the head too small.
At this point, I made a note to myself. What I learned in the first three days was that the first block-in and shading will not be perfect. Adjustments are necessary and that is okay.
When adjustments are necessary, call in the ear moving company or whatever company assists in what needs moved!
Ears are tilted out, not straight up and down on the face.
The rim of the ear has variations in width.
It doesn’t take any longer to draw something the way it looks than it takes to draw a simple shape.
The parts of the face are not separate (like Mr. Potato Head). They are all integrated into the face.
When drawing hair, draw first the gradation, then the strands.
Ellipse has a flattest part and a most curved part.
Do not overly define areas that are not definite to us. Draw what you see!
Let go of the perfect perception.
Leave some areas of the paper untouched for the brightest highlights.
Monday, July 18, 2011
The Ryder Studio – Day 2
“A neat workbench is a symptom of a sick mind.” ~ unknown
Day Two
Santa Fe, New Mexico
The second day was very frustrating for me at the Ryder Studio. It was frustrating in the sense that I felt like I was back in kindergarten, learning new things. I thought I already knew how to draw. Wrong! The highlight of the day was Anthony Ryder’s demonstration.
Anthony Ryder says that you want to capture the likeness of the model. Likeness is found in very fine measurement. Ask yourself, “Does it feel right?” We heard this question many times throughout the 10 days.
Recognition of a person is known from a distance. Look to the larger aspects of the frame, the body language. In a portrait, fine tune the big shapes to capture the person.
Order of the block-in
- Big outside shape – don’t try to get the outside shape perfect – adjustments come later.
- Features.
- Reconcile the two.
Nose
The nose goes up into the forehead and below the nose. Measure the length of under the nose to the top of the lip.
Neck
Neck muscles attach to underneath the cranium to the spine and to the shoulder. Think of the neckline of the shirt as a root ball of a tree.
Lips
The mid-line shadow twists like a ribbon.
Shadows are very important to the facial features.
The lips and eyes don’t have an outside shape. Draw the light and shadow and the shapes will appear!
3-D forms have a horizon.
Have you ever heard the expression, “Pass the hammer, there’s a fly on the baby?” It was said so we would not draw solid outlines around the shapes.
Did you know that drawings have a very sensitive attitude? Tune your perception to the model.
Draw the configuration of light. When placing or tracking the shadow edge, place the soft line at the terminator or form shadow edge. The form shadow edge (a.k.a. the terminator) is where the form turns away so much that it turns out of the light altogether and drops into shadow. This definition is found on page 98 of Anthony Ryder’s book The Artist's Complete Guide to Figure Drawing.
Shading
When beginning to shade, map the areas first and gradually build up the shading. Value change of the wash is very dependent on the light source. (Value bands – related to the shape of an object.)
Hair
Draw the hair with large shadow shapes.
Any linear form in the body will be translated by other linear lines running through it.
Anthony Ryder’s wife, Celeste, helped us each day. She said we need to make friends with the medium or process. I have to agree with her.
Monday, July 11, 2011
The Ryder Studio – Day One
“People are born like crackers, all crispy. They become stale when we try to normalize all their inconsistencies.” ~ Anthony Ryder
I recently spent 10 days at The Ryder Studio in Santa Fe, New Mexico, learning new portrait techniques from one of the current-day masters of drawing and painting, Anthony Ryder . I will give you a 10-week synopsis each Monday on The Drawing Board of what I learned each day.
Day One
The Ryder Studio
Santa Fe, New Mexico
Anthony Ryder glides the pencil over the paper in a feather-weight, not too heavy strokes. Kind of like a figure skater gliding over the ice or like brushing off lint from clothes.
The first step to drawing a portrait is what he calls the “block-in”. This is a series of lines that possess the length and tilt of the head. As nature does not possess straight lines, neither does the human form. There are no horizontal or vertical lines on the human form. Only curved lines exist.
There are short line segments that can be drawn into curves.
Use your reaction for measurement of the human form.
Your drawing will start to give you feedback the more involved you become with the piece.
When creating the block-in, do lots of cross-referencing to make sure the perspective is correct.
After the block-in of the outer part of the figure is drawn, start the block-in of the features. Anthony usually starts with the placement of the nose first, then moves on to the eyes and mouth.
Produce a non-contained space within the portrait. “Life has fewer fences than we think”, says Anthony. We do not see edges in nature, nor will we see them on the human form.
Friday, July 8, 2011
Painting with Colored Pencils Workshop
Colored Pencil on Stonehenge Paper
Copyright 2011 Valerie Jones
Painting with Colored Pencil
presented by
Saturday, August 6th, 10 AM – 4 PM
Location: Art Center in Johnstone Park
201 N. Cherokee, Bartlesville, OK
Artists of all levels can watch their colored pencil painting come alive in this workshop. Participants will learn how to create an under painting using colored pencils dissolved with solvents. The result of this process will make your drawing turn into a painting.
Register now! Class size is limited to 15 participants. A supply list will be sent to you upon registration.
Date: August 6th, 2011
Location: Art Center, 201 N. Cherokee, Bartlesville, OK
Workshop Fee: $60 for Bartlesville Art Association members, $75 for non-members.
Payment due at time of registration.
Registration is due by July 22nd.
Sunday, May 22, 2011
Art Donations
Work in Progress, “Jaxon”
2011 Copyright, Valerie Jones
I recently ran across an article on Empty Easel, titled Getting Requests for Artwork Donations? The article is about what to do if you are asked to donate your artwork.
I occasionally get requests to donate a piece of artwork to a good cause. If I believe in the cause, I will donate a small piece. Art takes time to produce and time is valuable.
The article goes on to explain that blogging takes time too. If you have noticed, I haven’t been blogging the last several months. I will not make excuses but will state the facts. I had been working on a commissioned piece. When I work on commission, blogs from me will cease to exist. I also have a young family that is important to me. Their needs will be met before blogging can occur. I would like to be able to blog three days a week, but right now that is not possible with my life schedule. I also work so most of my artistic energy goes there.
My goal for this summer is to post once or twice a month. If time allows, I will post more frequently. I enjoy hearing from each and everyone of you!
Monday, February 28, 2011
Everything’s Coming Up Roses
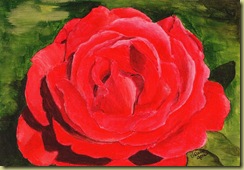
Study of a Rose
by Valerie Jones (2011)
My goodness, it has been quite a while since I posted anything. While my readers have been busily writing and keeping the world up to date with their lives, I have been playing nursemaid, mother, wife, and the many other hats I wear.
I did this painting today at work for a group of painters. I showed them what a painting will do when you add just a little more darks and lights to the mid-tones. And I showed them what a painting looks like when you mix your own darks and not use black. For some reason, they love black. I do not use black. I mixed red and green with a little blue to get the darks on the rose. I added a little more blue to the dark color to get the darks on the green background.
This painting will be donated to our local United Way chapter for their awards ceremony in May. I work for Elder Care and the art department has been asked to paint 25 paintings to be put on plaques for the award ceremony. We did this last year and it was a success!
Sunday, January 23, 2011
Jones’ Pump Jack
Jones’ Pump Jack
Copyright 2011 Valerie Jones
This piece was done with Prismacolor Colored Pencils and Derwent Watercolour Pencils. The pump jack was completed first using the Prismacolor Colored Pencils. I completed the pump jack first as an experiment. The colored pencils acted as a crayon resist to the watercolor, just as I’d hoped it would. No masking needed.
I completed the background using the Derwent Watercolour Pencils. This was achieved using a wash on the background first. To create the textures, I dipped the watercolour pencils in water to soften. This is a great way to create texture.
Have a wonderful day living creatively!

