I get a little carried away with details sometimes, but this is how I teach my students.
Step 1 – Pupil. I always start my portrait with the pupil of the eye. This is the darkest part of the face.
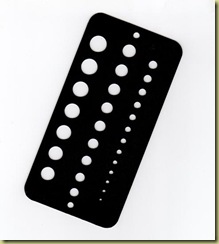
For an eye that is looking straight at you, the iris is perfectly round. A great tool to aid in getting the pupil and iris round is a drill gauge found in a drill set.
Using a very sharp 8B or Ebony pencil, lightly fill in the pupil area. I choose not to press heavy for this because the graphite will create a sheen with heavy pressure. So, a couple of light layers of graphite do the trick. This little guy has a highlight on the right side of the pupil, so it will be odd shaped.
Step 1
Step 2 - Iris. Iris have dark rims around them, so I start with that area. For this guy I used a 4B pencil. I don’t make a complete circle. I use the parenthesis ( ) technique. The eyelids finish off the iris at the end.
Highlights – Make the highlight larger than it really is. You can always make them smaller later. Once they are too small, it is difficult to make them large again.
Step 2
Step 3 – Blending. Now, I am ready to blend the iris. I take a small blending tortillion. After I blend, I do some minor touch-ups and blend again. I keep blending and touching up until I have the perfect iris.
Step 3-4
Step 4 – Whites of Eyes. The whites of our eyes are not pure white. Compare the whites of the eyes with the highlight on the iris. See? The highlight will be whiter. I either take a 2H pencil or a blender with a lot of graphite on it to create the white areas of the eye. The tear duct will be darker, so a pencil will need to be used for this. If you get the whites too dark, use the kneaded eraser to lighten the area.
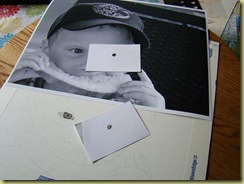
**Tip** Sometimes you will notice that the outline drawing on your paper is not drawn accurately. This is where the clear acetate line drawing comes in handy. Place it on top of your drawing to find your place again.
**Tip** Another helpful tool is a value finder. Place one on your photo reference and another on your drawing. This will aid you in getting perfect values on your drawing.
Step 5 – Eyelids. Now for the area around the eye. I darkened the eyelid line with a 2B pencil. Then, with a B pencil, I started in the shadows of the eyelid. Pay close attention where these darker values sit. Is it on the lid or on the brow bone? Keep the eyelid line dark. If it blends in too much, the eye will appear flat.
Taking the same small blender, I blended the eyelid.
Then, I moved to the bottom lid. Remember that our eyelids have thickness to them. Some refer that thickness on the bottom eyelid as an antwalk. Be sure to capture this thickness in your drawing even if your reference doesn’t show it.
After blending, I then moved to the skin area underneath the eye. You are saying “What? What about the eyelashes?” Be patient, they are coming…
Step 5
Step 6 – Eyelashes. Now, for the long awaited eyelashes! Eyelashes are drawn in clumps, not in straight lines.
OOPS…before we go to the eyelashes. (I’m sorry.) I forgot to tell you that are eyelids cast a shadow on our eyes. So, a step or two back…Darken the upper part of the eye and blend.
NOW, the eyelashes! The top lashes are usually darker than the bottom lashes. I took a very sharp 4B pencil to create the lashes.
It is very important to have the skin tones around the eyes complete before putting in the eyelashes.
Step 6
He’s looking rather racoonish, eh?
Next time on The Drawing Board, the nose…


2 comments:
I'm really enjoying this 'face tutorial'! Never considered myself much good at faces - in fact have avoided them...I may just be tempted to give one a go thanks to your guidance!
Hi Tracey,
I used to be afraid of portraits for a long time too. Not anymore. They are now my favorite subject. Go ahead and try a face. If you have questions or need some help, please contact me. I love to help others learn.
Be looking Monday for a tutorial on the nose.
Post a Comment