Monday, July 18, 2011

The Ryder Studio – Day 2


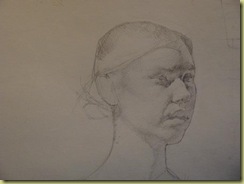
Ryder Demo Day 2(2) sm Copyright 2011 Anthony Ryder

“A neat workbench is a symptom of a sick mind.” ~ unknown

Day Two

The Ryder Studio

Santa Fe, New Mexico

The second day was very frustrating for me at the Ryder Studio. It was frustrating in the sense that I felt like I was back in kindergarten, learning new things. I thought I already knew how to draw. Wrong! The highlight of the day was Anthony Ryder’s demonstration.

Anthony Ryder says that you want to capture the likeness of the model. Likeness is found in very fine measurement. Ask yourself, “Does it feel right?” We heard this question many times throughout the 10 days.

Recognition of a person is known from a distance. Look to the larger aspects of the frame, the body language. In a portrait, fine tune the big shapes to capture the person.

Order of the block-in

  1. Big outside shape – don’t try to get the outside shape perfect – adjustments come later.
  2. Features.
  3. Reconcile the two.

Nose

The nose goes up into the forehead and below the nose. Measure the length of under the nose to the top of the lip.

Neck

Neck muscles attach to underneath the cranium to the spine and to the shoulder. Think of the neckline of the shirt as a root ball of a tree.

Lips

The mid-line shadow twists like a ribbon.

Shadows are very important to the facial features.

The lips and eyes don’t have an outside shape. Draw the light and shadow and the shapes will appear!

3-D forms have a horizon.

Have you ever heard the expression, “Pass the hammer, there’s a fly on the baby?” It was said so we would not draw solid outlines around the shapes.

Did you know that drawings have a very sensitive attitude? Tune your perception to the model.

Draw the configuration of light. When placing or tracking the shadow edge, place the soft line at the terminator or form shadow edge. The form shadow edge (a.k.a. the terminator) is where the form turns away so much that it turns out of the light altogether and drops into shadow. This definition is found on page 98 of Anthony Ryder’s book The Artist's Complete Guide to Figure Drawing.

Shading

When beginning to shade, map the areas first and gradually build up the shading. Value change of the wash is very dependent on the light source. (Value bands – related to the shape of an object.)

Hair

Draw the hair with large shadow shapes.

Any linear form in the body will be translated by other linear lines running through it.

Anthony Ryder’s wife, Celeste, helped us each day. She said we need to make friends with the medium or process. I have to agree with her.
Monday, July 11, 2011

The Ryder Studio – Day One


Ryder Studio Door sm

“People are born like crackers, all crispy. They become stale when we try to normalize all their inconsistencies.” ~ Anthony Ryder

I recently spent 10 days at The Ryder Studio in Santa Fe, New Mexico, learning new portrait techniques from one of the current-day masters of drawing and painting, Anthony Ryder . I will give you a 10-week synopsis each Monday on The Drawing Board of what I learned each day.

Day One

The Ryder Studio

Santa Fe, New Mexico

Anthony Ryder glides the pencil over the paper in a feather-weight, not too heavy strokes. Kind of like a figure skater gliding over the ice or like brushing off lint from clothes.

The first step to drawing a portrait is what he calls the “block-in”. This is a series of lines that possess the length and tilt of the head. As nature does not possess straight lines, neither does the human form. There are no horizontal or vertical lines on the human form. Only curved lines exist.

There are short line segments that can be drawn into curves.

Use your reaction for measurement of the human form.

Your drawing will start to give you feedback the more involved you become with the piece.

When creating the block-in, do lots of cross-referencing to make sure the perspective is correct.

After the block-in of the outer part of the figure is drawn, start the block-in of the features. Anthony usually starts with the placement of the nose first, then moves on to the eyes and mouth.

Produce a non-contained space within the portrait. “Life has fewer fences than we think”, says Anthony. We do not see edges in nature, nor will we see them on the human form.

Friday, July 8, 2011

Painting with Colored Pencils Workshop

Demo 8 - Complete

Colored Pencil on Stonehenge Paper

Copyright 2011 Valerie Jones


Painting with Colored Pencil

presented by

Valerie Jones

Saturday, August 6th, 10 AM – 4 PM

Location: Art Center in Johnstone Park

201 N. Cherokee, Bartlesville, OK

Artists of all levels can watch their colored pencil painting come alive in this workshop. Participants will learn how to create an under painting using colored pencils dissolved with solvents. The result of this process will make your drawing turn into a painting.

Register now! Class size is limited to 15 participants. A supply list will be sent to you upon registration.

clip_image001

Date: August 6th, 2011

Location: Art Center, 201 N. Cherokee, Bartlesville, OK

Workshop Fee: $60 for Bartlesville Art Association members, $75 for non-members.

Payment due at time of registration.

Registration is due by July 22nd.